


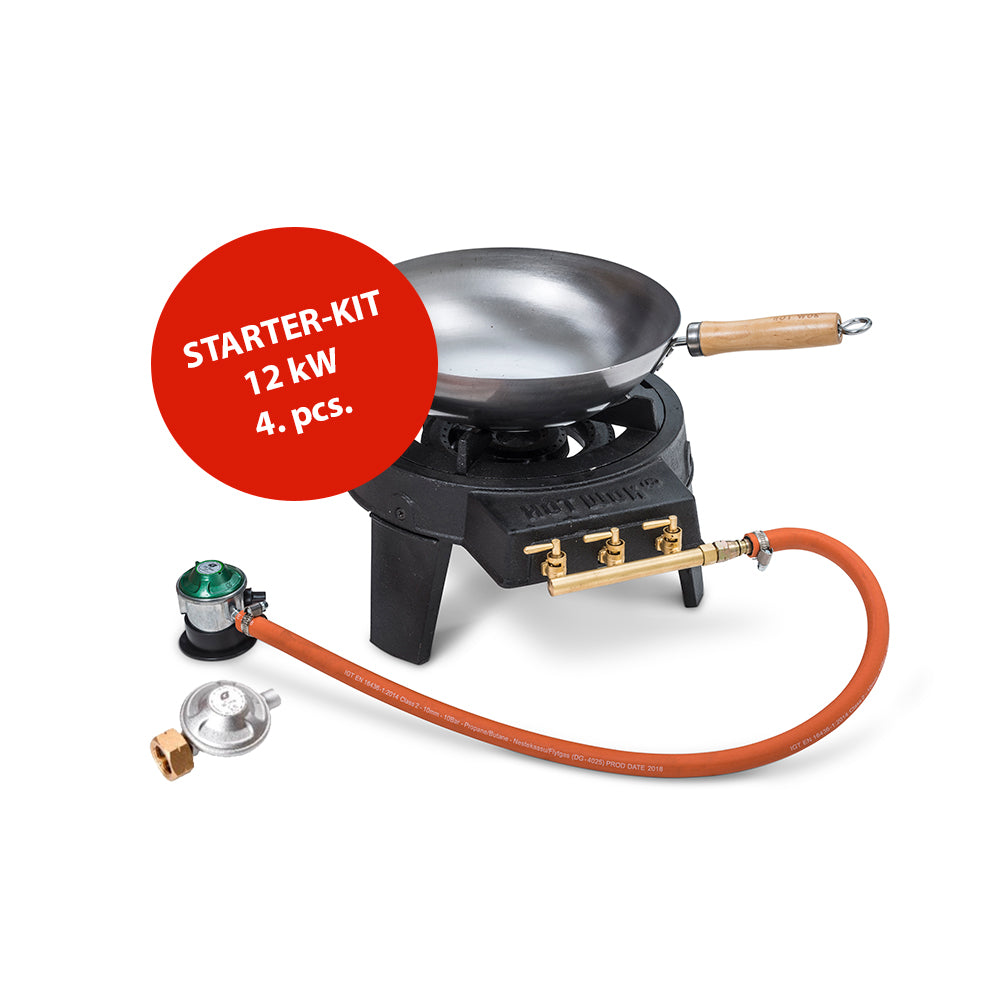
How to unboxing your HOT WOK 12 kW Original.
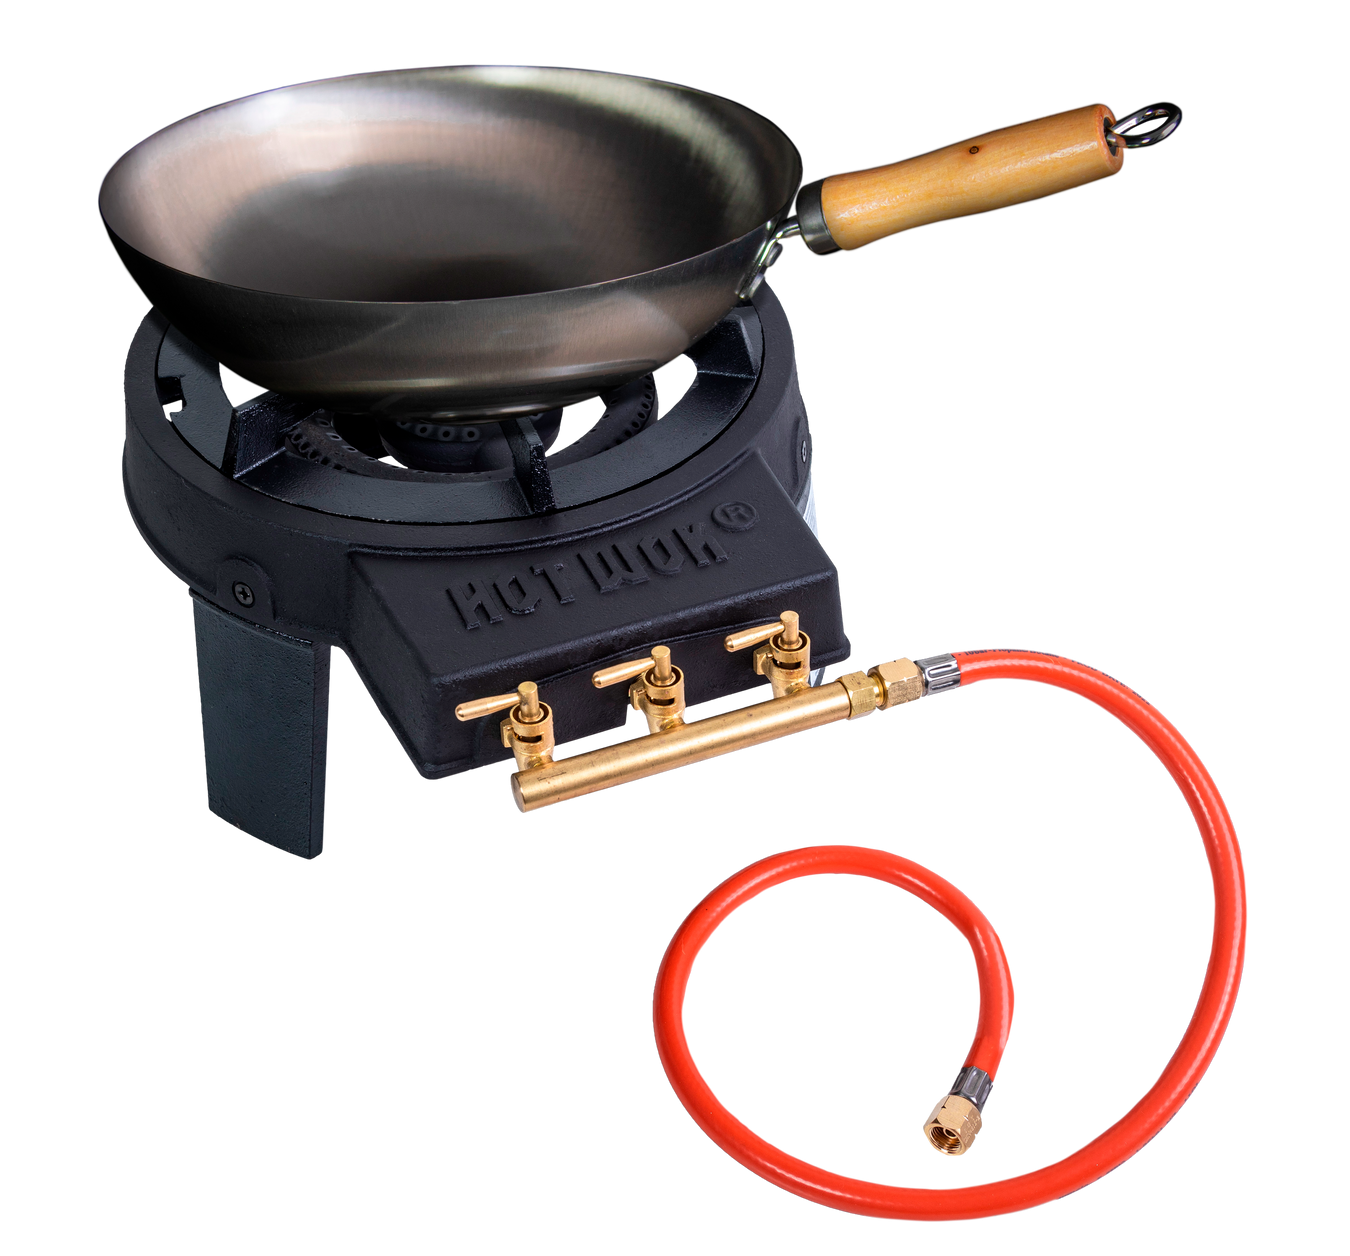
Unboxing of a HOT WOK PROFESSIONAL 12 kW
First, open the box and lift out your new Wok and its handles.
You assemble your wok pan by putting this small metal end piece on first.
Then the wooden handle with the screw at the end.
Make sure the wooden handle fits properly down on the wok pan and tighten the screw at the end of the handle.
The gas valve is also removed and fitted to the gas flare.
Now open the inner box where the burner is.
Here you will find the inner burner ring, legs and burner housing for the gas flare.
There are 3 legs and a small box bag with 3 screws to it. The last screw is for the inner burner ring.
Now everything is unpacked.
You now put the 3 legs on the burner housing.
Now you mount the inner burner ring.
Put the screw in at the end opposite the valves for gas.
Then fit the valve for the gas. Wait until the gas hose and regulator are fitted.
Note there are 3 screws to control the oxygen. It is important that the oxygen and gas are mixed correctly for the best combustion.
Adjust these oxygen until the flames turn yellow and stop.
Now add the burner ring to the wok pan.
Note that you will need a flat burner ring for pots/pans other than a wok for them to stand stable.
You can now fit your gas hose and regulator to the wok set and put the gas flare into use.
Remember to burn the wok pan BEFORE you cook for the first time. This is only necessary the first time.
To learn how to burn the wok pan for the first time, visit hotwok.com/faq
Enjoy your new HOT WOK
Find more inspiration at www.hotwok.com


Have you ever wondered why wok dishes from restaurants taste so good? The crispy texture of the vegetables and the juicy meat are hard to recreate at home. But the secret lies not just in the ingredients but also in...

Do you love Thai food but think it’s too difficult to make at home? We’ve got great news for you! At HOT WOK, we now offer the most delicious meal boxes from Konkrua, making it super easy to prepare authentic...

Have you ever made a red or green Thai curry, only to find that it’s not as rich and colorful as you expected? Don’t worry, we have a simple solution that will ensure your curry not only tastes amazing but...